
Western Online
Creating Assessments
Welcome to the Western Online: Creating Assessments online tutorial brought to you by the Center for Innovation in Teaching and Research. This tutorial demonstrates how to create and use assessments such as quizes, surveys, and self assesments in the Western Online system.
After completing this tutorial you will be able to:
This tutorial uses text poppers. Text poppers are words or images that you can hover over to get more information. Hover over the words Text Popper below to see an example.
Text Popper
Use the links above and below to navigate through the tutorial.
Assessments are used as an evaluation tool for student work and knowledge. assignments, assessments, and discussions in Western Online. Rubrics can only be created by an instructor, but can be published to a student's ePortfolio and shared with others by the student.
Assessments come in three forms within the D2L/Western Online environment; quizes, surveys, and self assessments. The focus will be on the Quizes tool for this tutorial with explanation of the surveys and self assessments to follow.
To create a quiz the questions need to be created or imported into the Question Library first. Creating questions in the Questions Library allows the creating of randomized questions within a quiz and reuse of questions in multiple assessments such as a final exam.
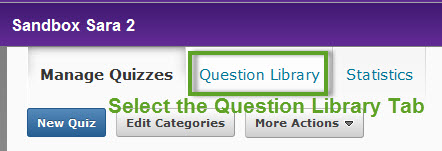
To begin creating questions select Assessments > Quizzes from the toolbar. Select the Question Library tab, select New > New Section. This will create a new folder within the library to store the questions.
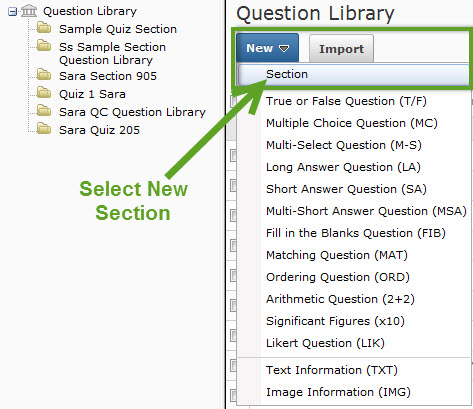
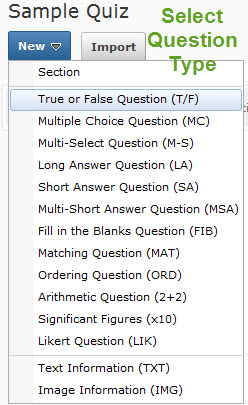
Select the folder within the Question Library which was just created. Now the questions can be created! There are several different types of questions available; True/False, Multiple Choice, Short Answer, Long Answer, Ordering, etc. Use the New pulldown and select the type of question. Enter the title, question text and answers if required. Enter 100 into the Value of the correct answer, this means that answer is 100% correct. Do not enter the number of points for that question, if you do it will grade the question inacurrately.
To create a new quiz go to your course and select the Assessments > Quizzes icon in your tools menu.

The Manage Quizzes page will appear with a list of your existing quizzes and the option to create a new quiz. Select New Quiz.
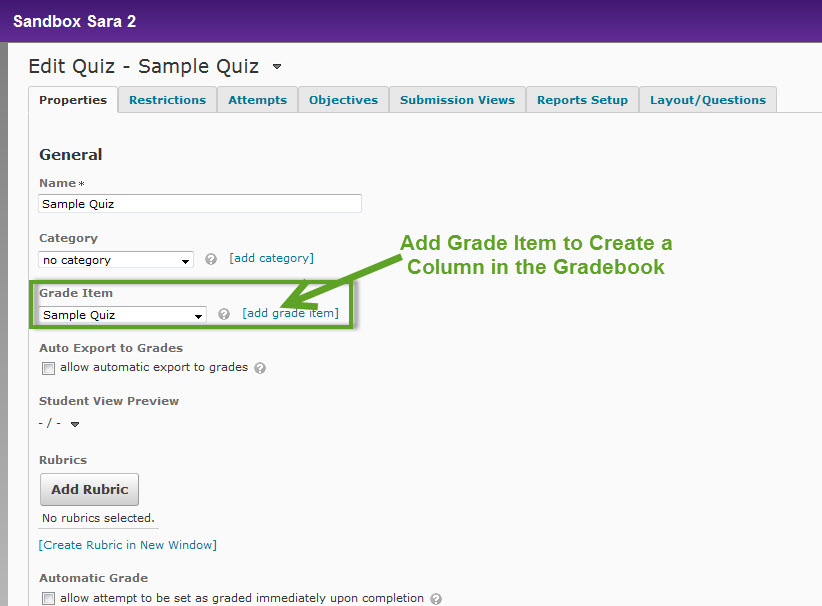
In the Properties tab add a Name, Category and Grade Item. Select add grade item to add the item to the gradebook. Enter a Name for the gradebook column and Maximum Points, select Save. Note: creating a quiz or assignment does not automatically add the item to the gradebook, add grade item needs to be selected to add for students to view in the gradebook. Continue adding the properties for the quiz. Select Save at the bottom of the page.
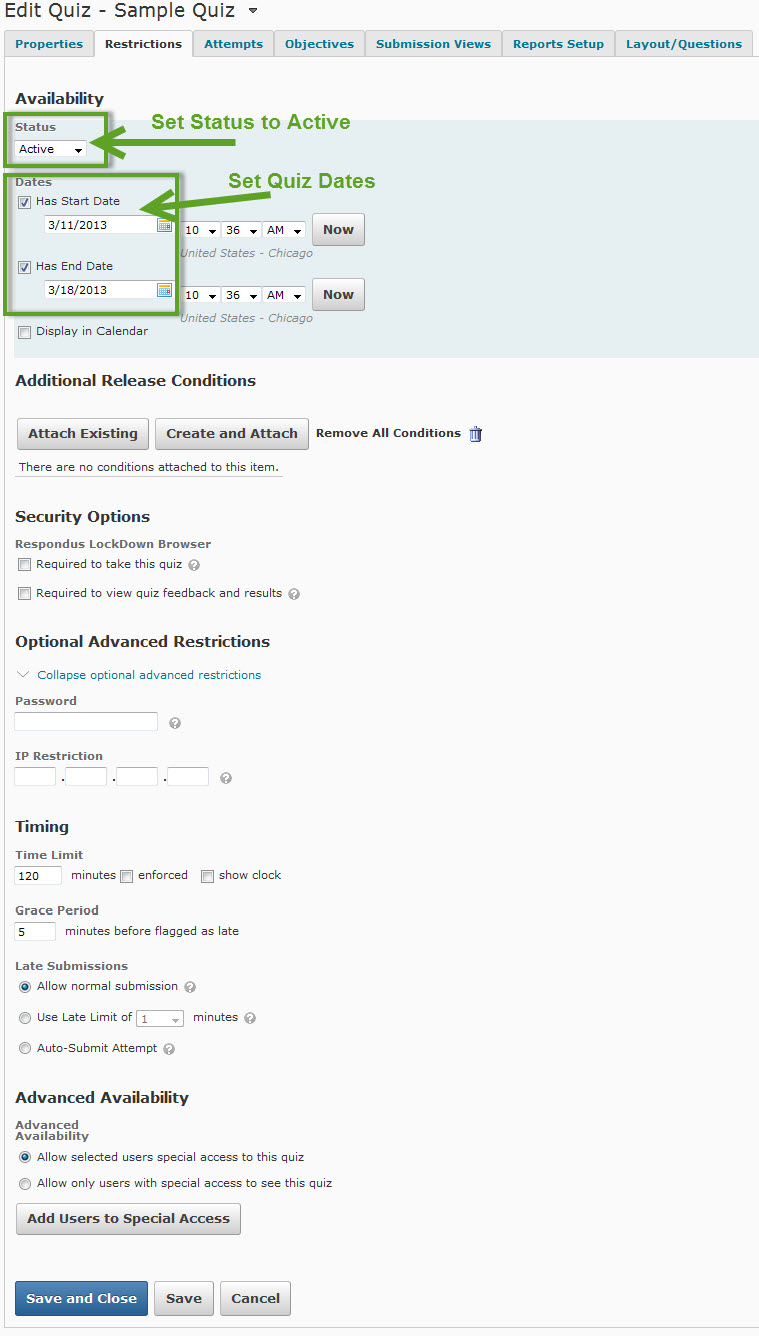
Move to the next tab, Restrictions. This is where the availability, dates, and other release conditions will be set.
The Status will need to be changed to Active for students to view and take the quiz. Enter the Start Date and End Dates. Enter Release Conditions, Security Options and other Restrictions. Select Save at the bottom of the page.
 f
f
To add students with special release conditions such as a different time or date use the Advanced Availability section. Select Add Users to Special Access button. Add the dates if they are different and extend the Time Limit to the suitable amount, place a check next to the student it applies to, select the Add Special Access button.
Note: There can be multiple users with unique access in a quiz.
To edit or delete special access for a user use the Restrictions tab, Advanced Availability. Use the pencil tool to edit the settings or the trash can icon to delete the settings associated with the user.
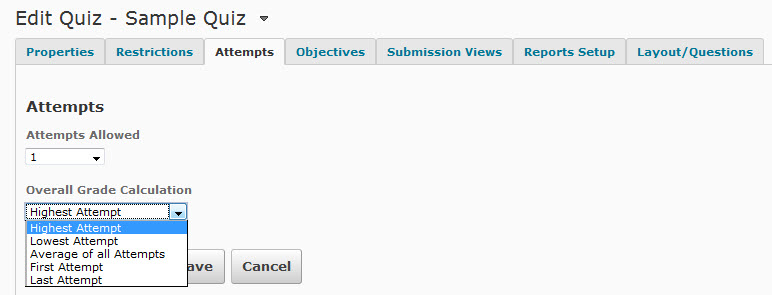
Select the Attempts tab, this will set the number of attempts or tries the student is allowed to take the assessment. If more than one attempt is chosen select the Overall Grade Calculation. The Overall Grade Calculation will take either the highest, lowester, average, first, or last attempt the student has performed. Select Save and Close.
The Objectives tab is optional, if there are objectives to associate with the assessment select the Objectives tab and enter the objectives.
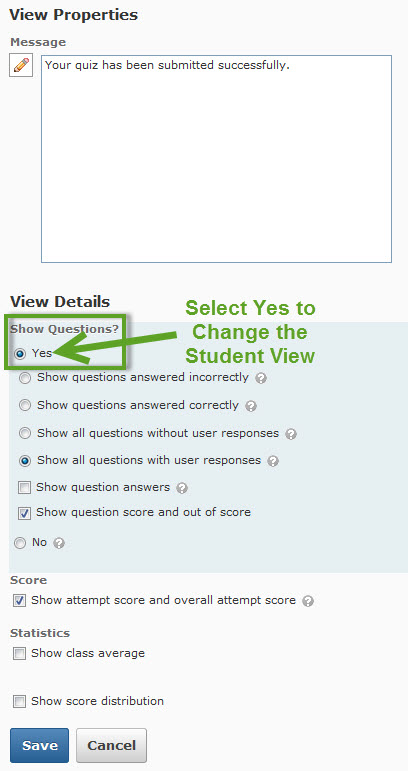
The Submission Views tab is defaulted to Show attempt score and overall atttempt score and not view the answers. The submission views allows the instructor set what the student will see when taking and submitting a quiz. To allow students more views, select the Default View link Show Questions? Yes. Select the options for the students to view, such as, show questions answered incorectly, show questions answered correctly, etc. Choose Save when all of the views have been selected.
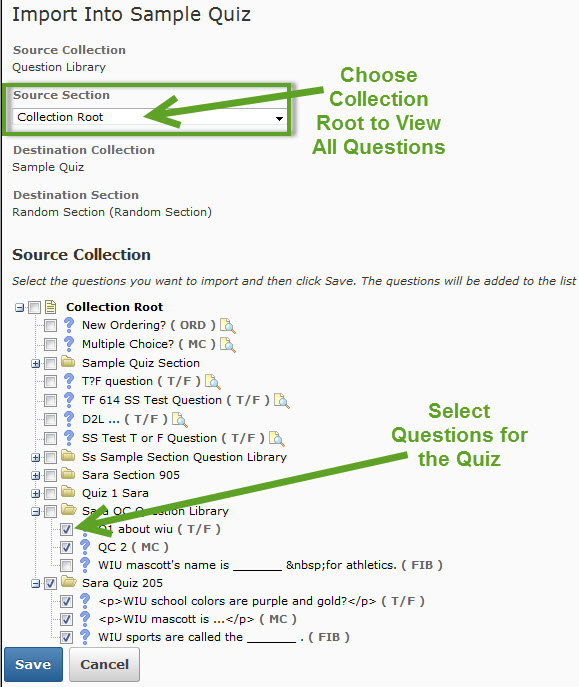
Select the Layout/Questions tab to create the questions for the quiz, select the Add/Edit Questions button. To create a randomized quiz all questions must be previous entered into the Question Library. Use the New > Random Section. Enter a title such as "Random Section" and Save. This will create a folder, select the folder you just created and select Import. This will allow you to import questions from the Question Library.
From the Source Section pulldown choose Collection Root. Select the questions for the quiz by using the checkboxes to the left of the items, select Save.
Enter the number of questions per attempt and point value, for instance if you had 75 questions and you only wanted students to take 50 at 2 points each. In this instance not all students would be answering the same questions since they are setup in a Random Section. Enter the values, select Done.
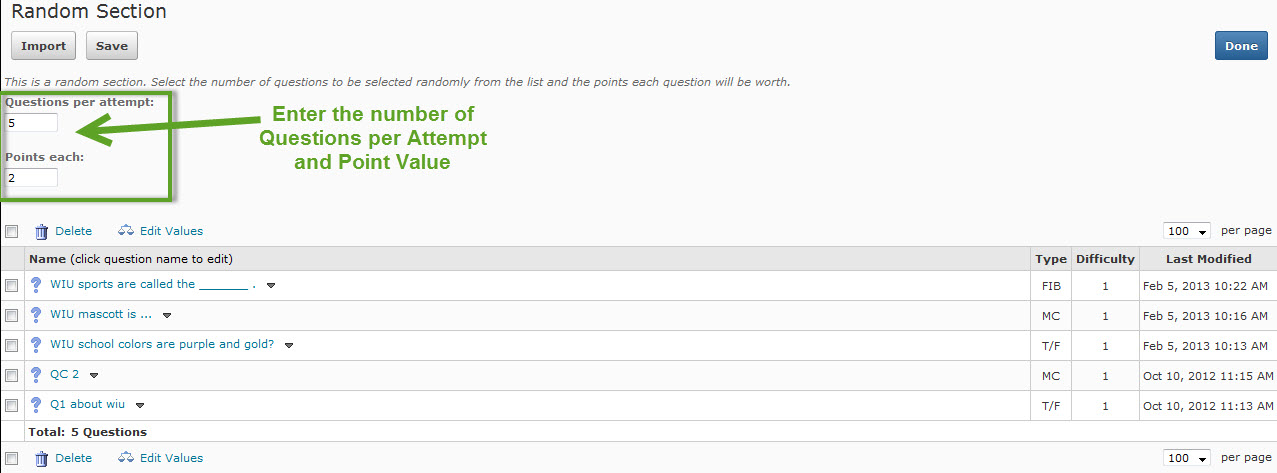
It will then ask for how many questions per page, this is what the students will see while taking the test. It is good practice if you have a large quiz to only allow students to see a few at a time, this also cuts down on cheating. Enter the Questions per attempt, select Apply.
To preview the quiz as a student go to the Assessments > Quizzes. There will be a list of the quizzes, to preview the quiz use the pulldown arrow to the right of the quiz title, select Preview.
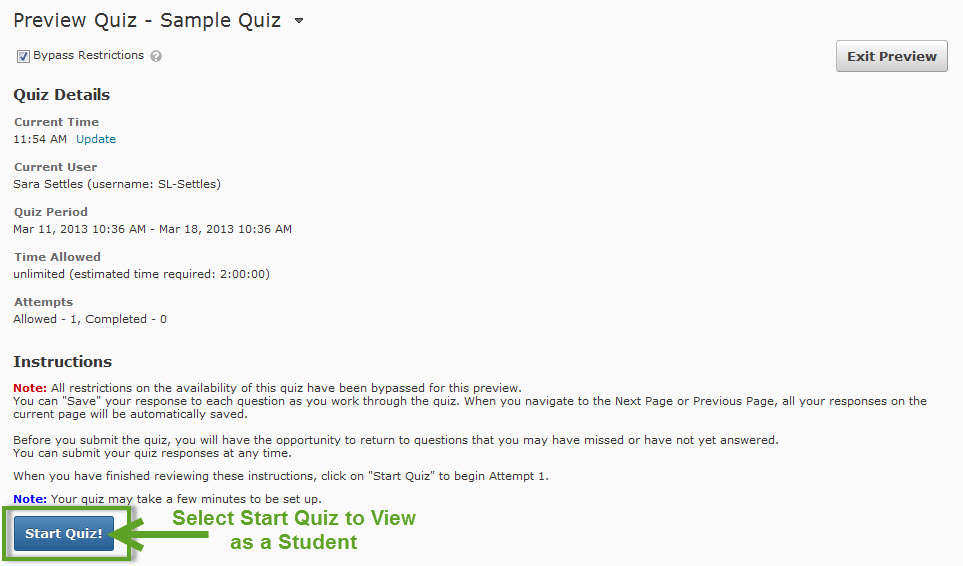
If you need to update or change a question simply go into the quiz and select Add/Edit Questions... click on the questions you want to edit, and edit. When the question is saved it will ask if you want to update the question in the quiz only or within the Question Library as well, make sure and update the question in both places!
Show/hide comprehension question...
Show/hide comprehension question...
Show/hide comprehension question...
Show/hide comprehension question...
Show/hide comprehension question...
Congratulations! You have completed the Western Online: Creating Assessments tutorial. You have learned about the assessments tool how to create questions and quizzes in Western Online.
Click here to help us improve our online tutorial